WELCOME TO ANDERSON PAINTING
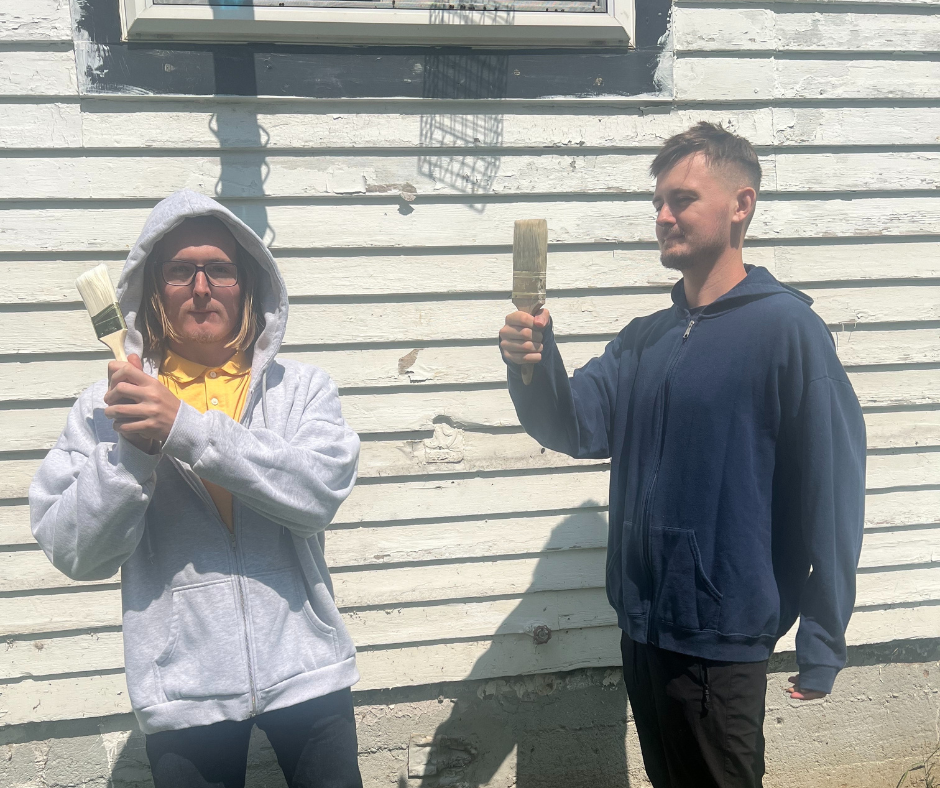
A small house painting company ran and operated by two brothers: Zach and Noah Anderson
About
our company
We're not a big crew. We're just two brothers — born into this trade, raised around the scent of fresh paint and the hum of hard work. Painting homes isn’t just what we do — it’s what we’ve always done.
With years and years of hands-on experience between us, we’ve built our company on one simple idea: do it right, and do it like it’s our own home. No subcontractors, no middlemen — when you hire us, you get us. Every estimate, every phone call, every brushstroke, every detail, every finish — we handle it personally.
We take pride in the work we do, and we don’t cut corners. From prep to cleanup, we treat every job with care and respect, because we know it’s not just a house — it’s your home.
If you're looking for honest, high-quality painting from people who genuinely care, we’d love to work with you.

Services
-

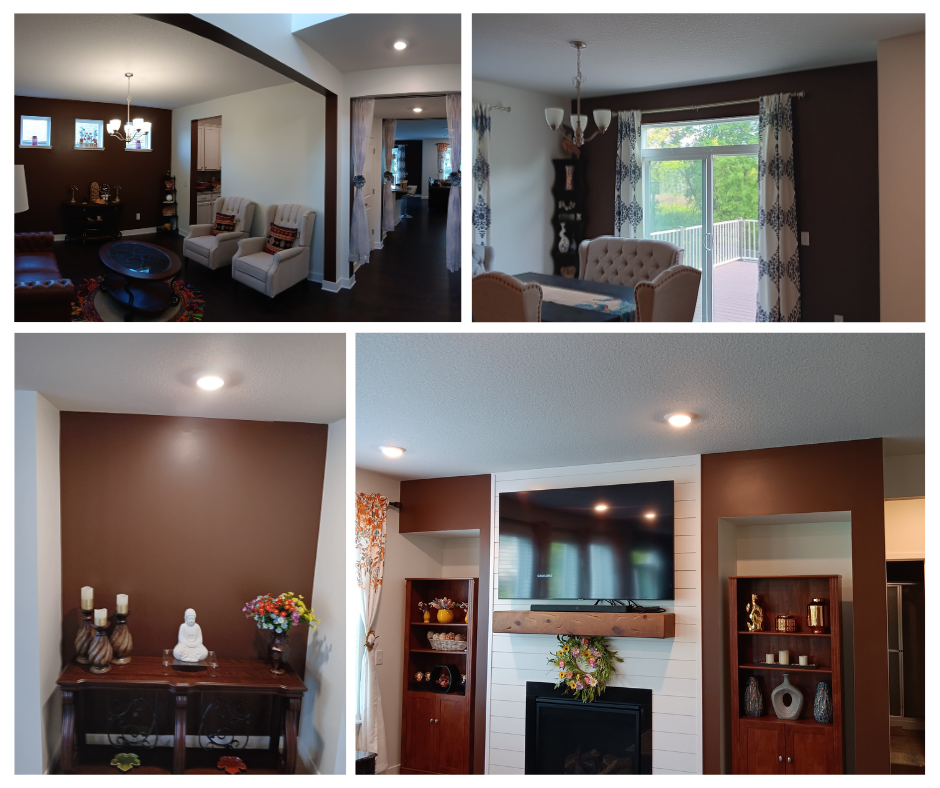
Interior Painting
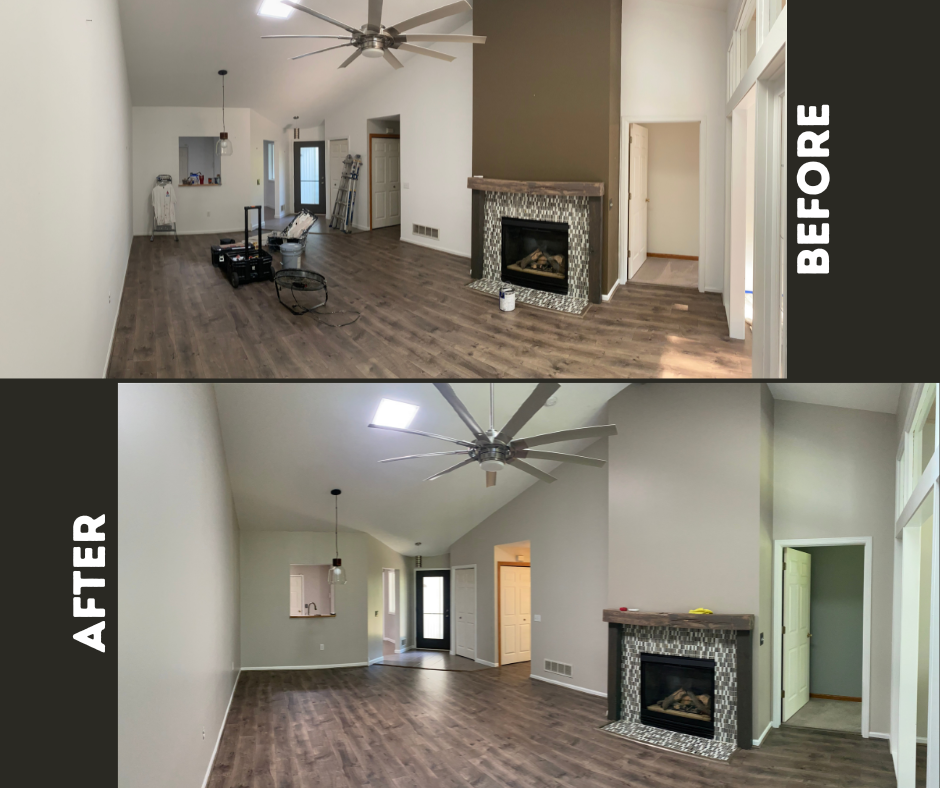
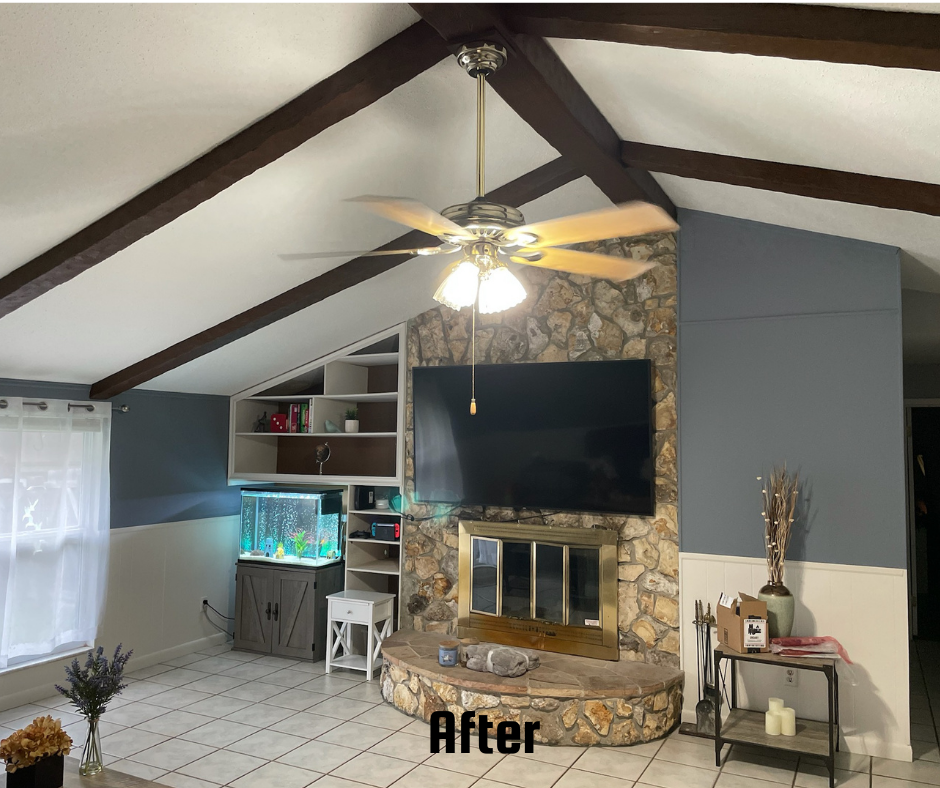
Whether it’s one room or the whole house, we take the time to do it right. From careful prep and clean lines to smooth, lasting finishes, we treat your home with the respect it deserves. We handle walls, ceilings, trim, doors — everything — with attention to detail and a steady hand. No mess, no hassle — just a clean, fresh look you’ll love.
-
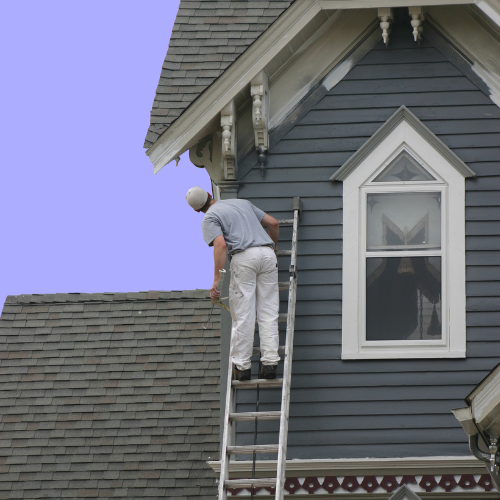
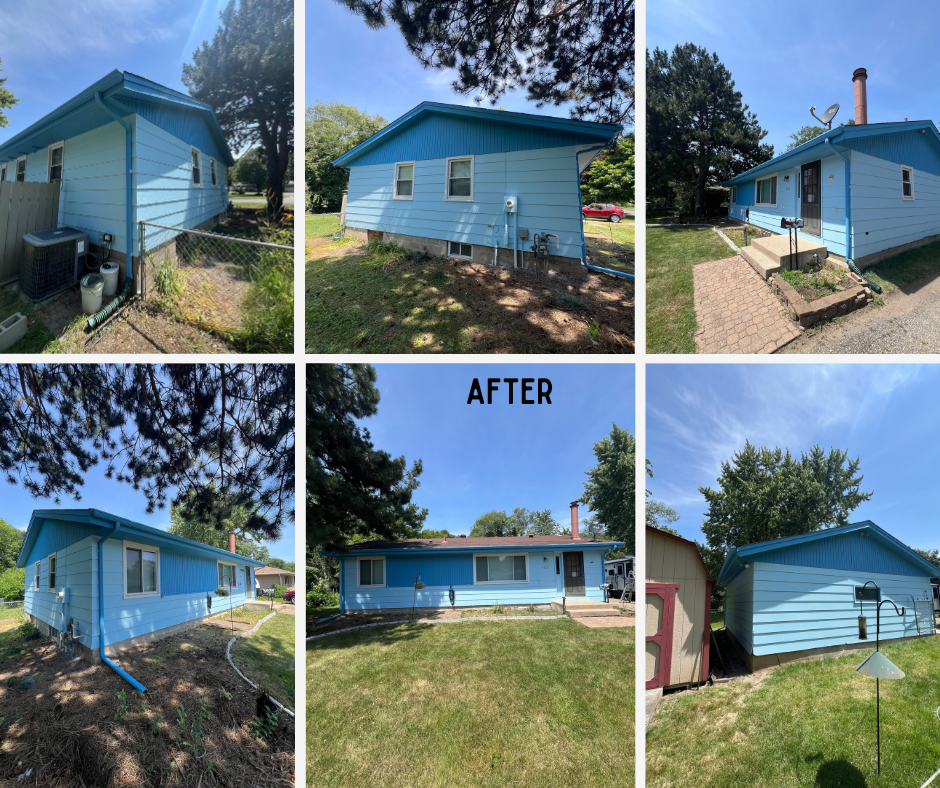
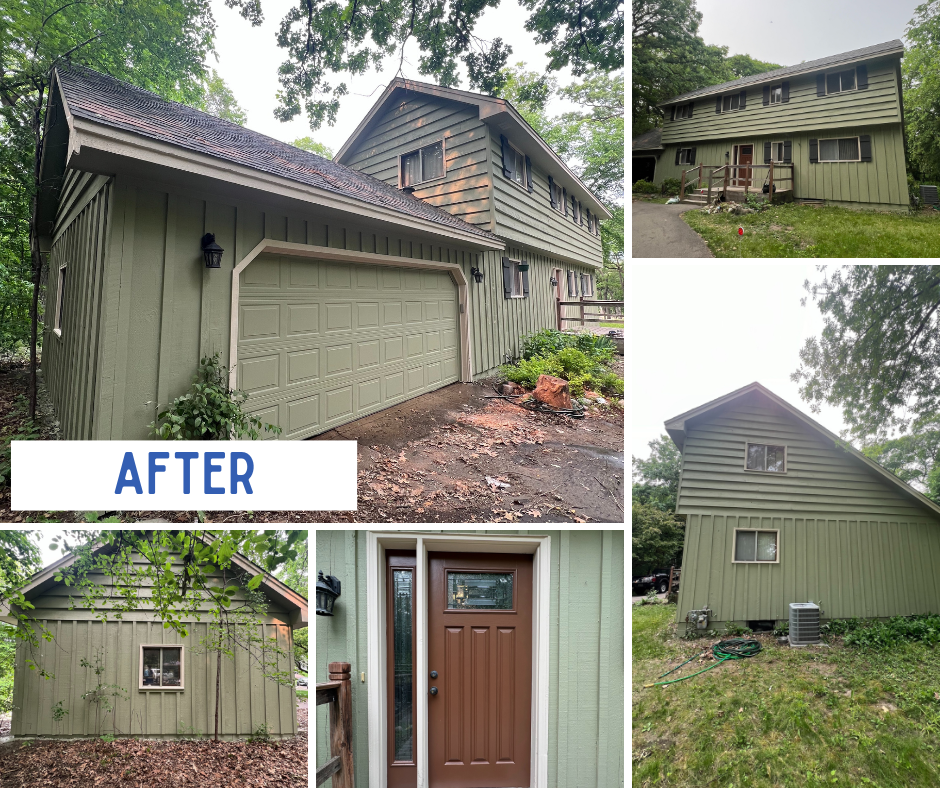
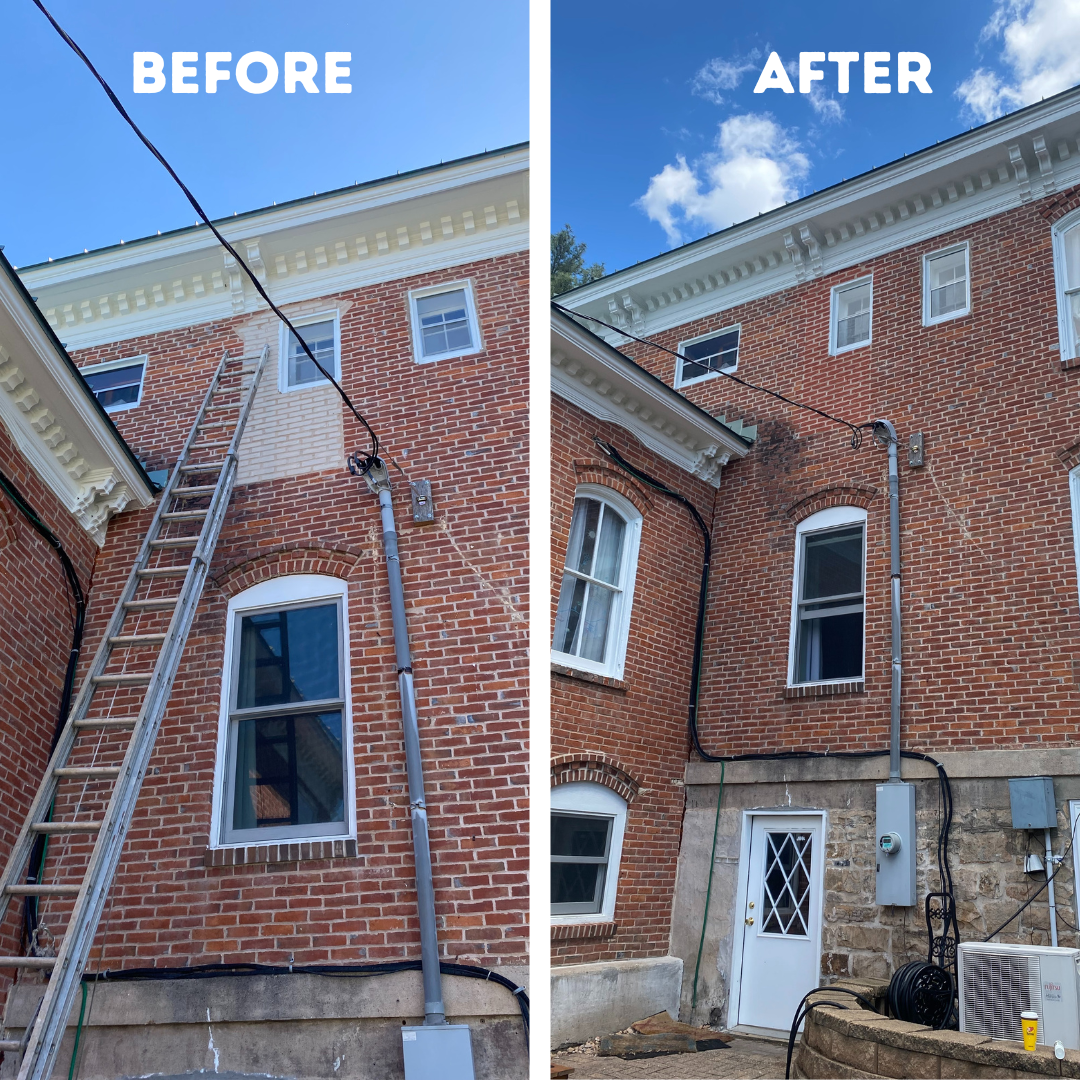
Exterior Painting
Your home’s exterior takes a beating from the elements — we make sure it stays protected and looks its best. From power washing and surface prep to high-quality paint and clean, even coats, we do the job right from start to finish. We paint siding, trim, doors, porches, and more — all with durable materials and a careful, experienced touch.
-

Pressure Washing
A great paint job starts with a clean surface. We offer pressure washing to remove dirt, mold, mildew, and old paint buildup from siding, decks, driveways, and more. It’s an essential step before painting, but it’s also a great way to refresh your home's appearance on its own. We’re careful where it counts and thorough where it matters — leaving surfaces clean, not damaged.
-

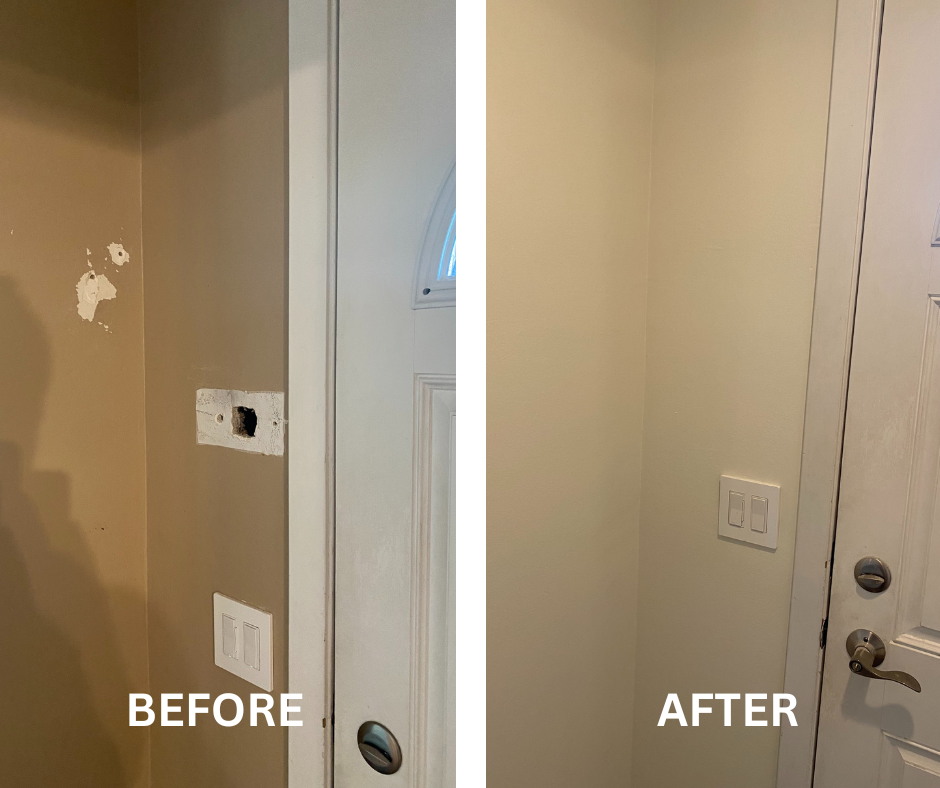
Drywall Repair
Before the paint goes on, the walls need to be right. We patch holes, fix cracks, and smooth out rough spots so your walls look clean and seamless. Whether it’s minor touch-ups or larger repairs, we take the time to do it properly — no shortcuts, no sloppy fixes. Just solid, smooth walls ready for a flawless finish.
-

Exterior Siding Repair
Paint only looks as good as the surface underneath. We repair damaged, rotting, or warped siding to make sure your home is solid and ready to be painted. Whether it's wood, composite, or another material, we replace or patch what's needed and prep it for a smooth, lasting finish. Quality repair means longer-lasting paint — and better protection for your home.
-

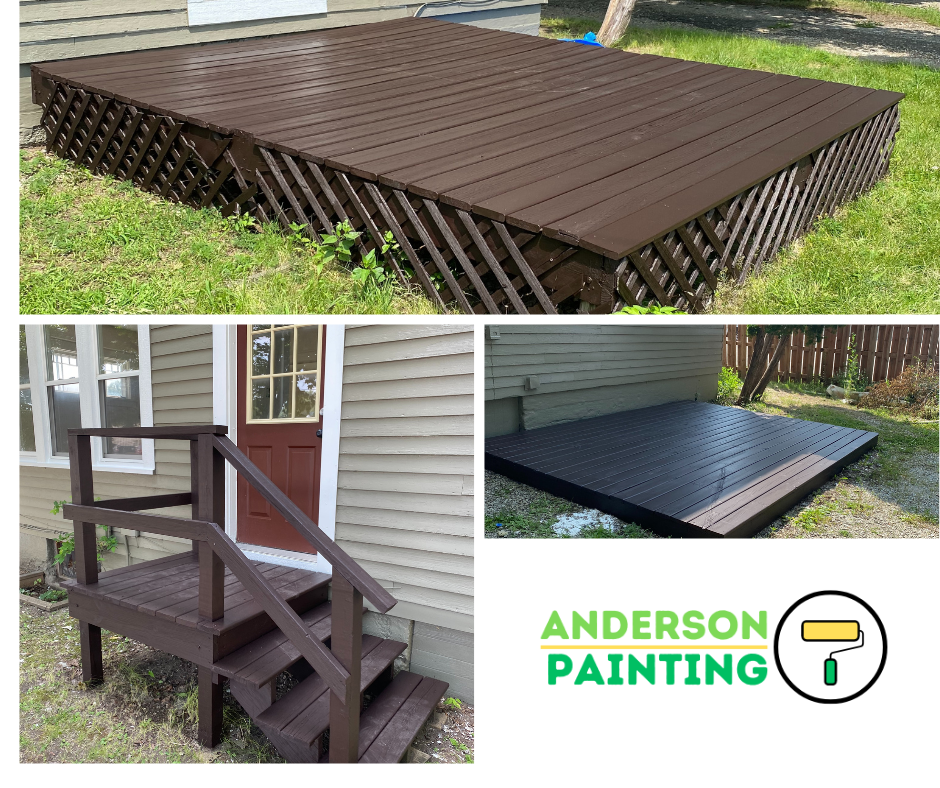
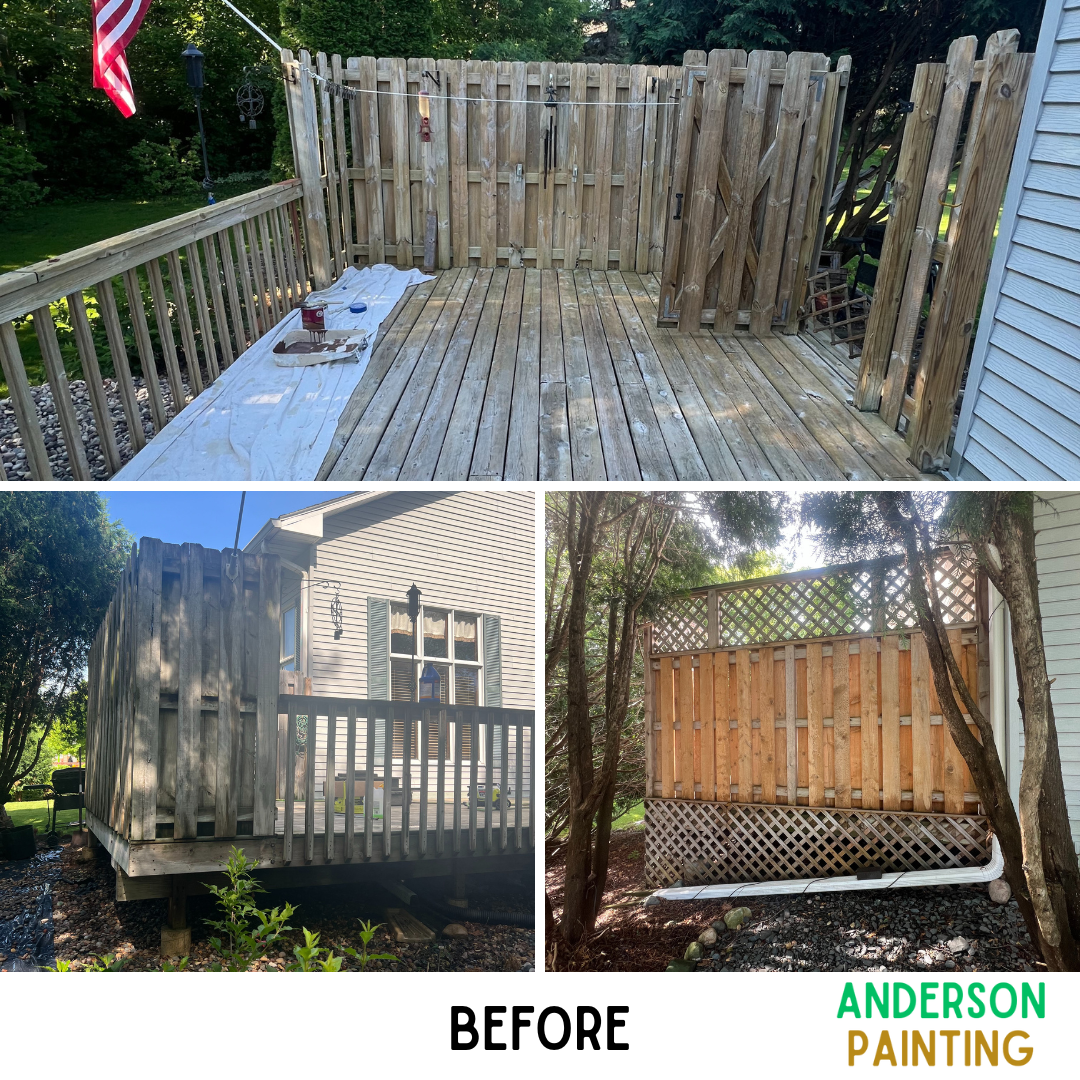
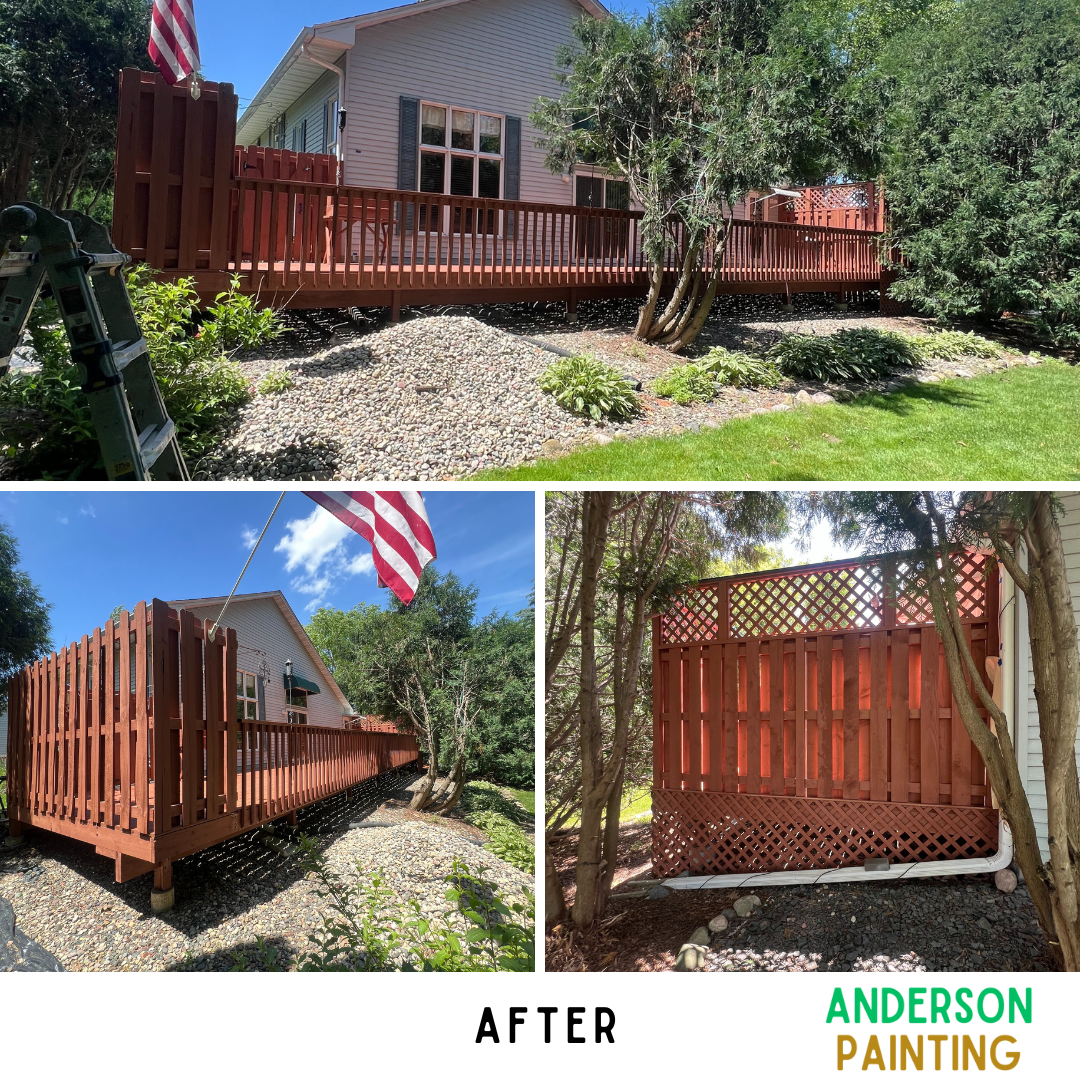
Deck Staining
A properly stained deck not only looks great — it lasts longer, too. We clean, prep, and stain decks with care, using quality products that protect against sun, moisture, and wear. Whether you're refreshing an old finish or staining new wood for the first time, we make sure it’s done right — even coverage, rich color, and long-lasting protection you can count on.


Contact Us
Interested in working together? Fill out some info and we will be in touch shortly. We can’t wait to hear from you!